To Our CGM DAQbilling Customers,
We would like to announce the release of DAQbilling version 6.
Paper Claim and Attachment Updates:
Paper claims and attachments will now be transmitted through eMedix. Attachments will be transmitted
to the insurance company electronically if the option is available, otherwise they will be faxed or mailed.
The “Bill Electronic” check box has been removed from the encounter screen. All claims will be transmitted
to eMedix and the transmission method to the insurance will be determined by the payer ID.
eMedix Attachment Service:
The status of attachments can be monitored at online.emedixus.com. Any issues with attachments must be addressed
at eMedix. Please see the eMedix release notes on the attachment service below.
If there are any questions about how to view and manage attachments at eMedix, please contact their support team at (855) 270-6700, option 3 and then option 1.
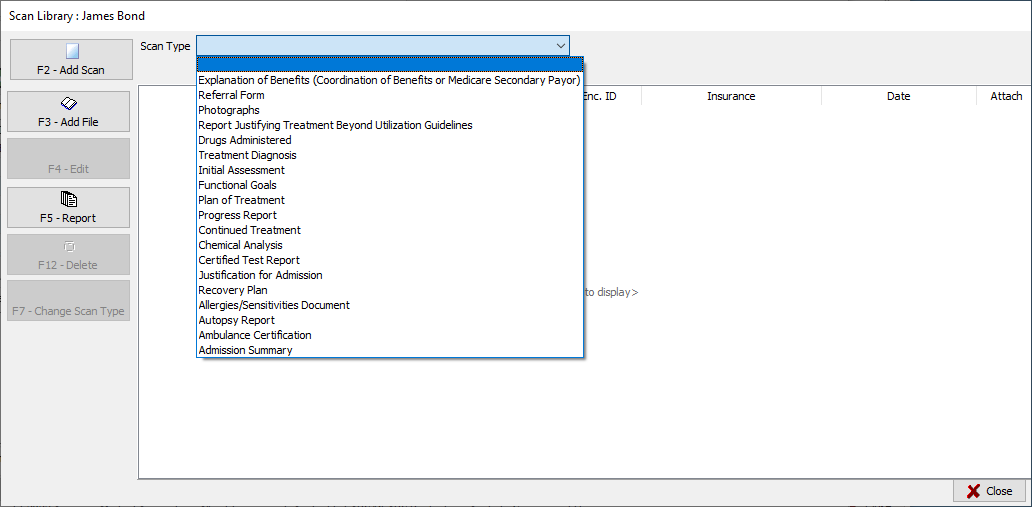
Adding an attachment to an encounter:
The process of adding an attachment to an encounter has been modified to gather the additional information
needed to transmit the attachment electronically to eMedix. Prior to adding an attachment, a scan type must
be selected from the dropdown.
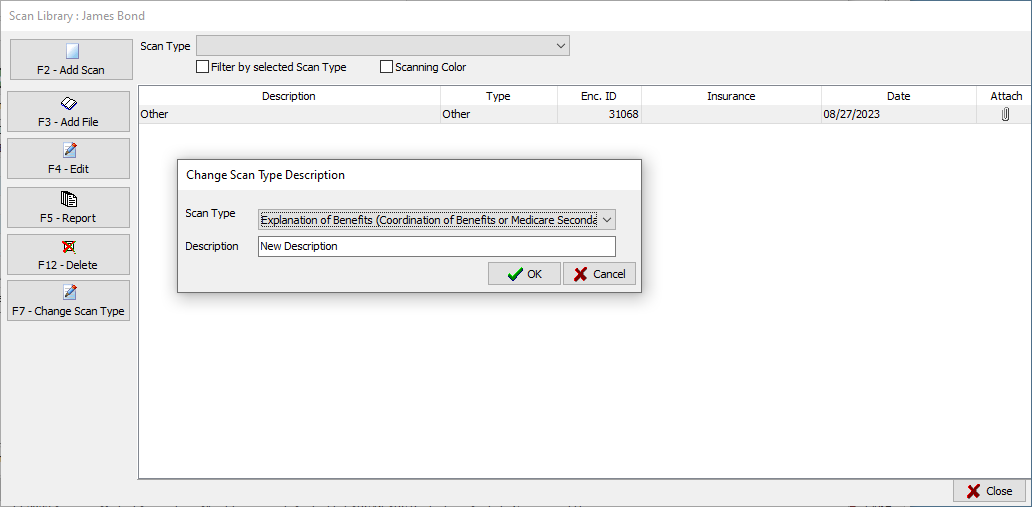
Any attachments that were added prior to this update and have an invalid scan type like “Other” will require their
scan type to be changed to a valid “Report Type Code” used to send the “PWK – claim supplemental information” segment for the encounter.
To change the scan type, select the scan that that needs to be changed and then click on “Change scan type”. A “Change scan type” box
will display. Select the appropriate scan type from the dropdown and change the description if needed and click Ok.
Scanning:
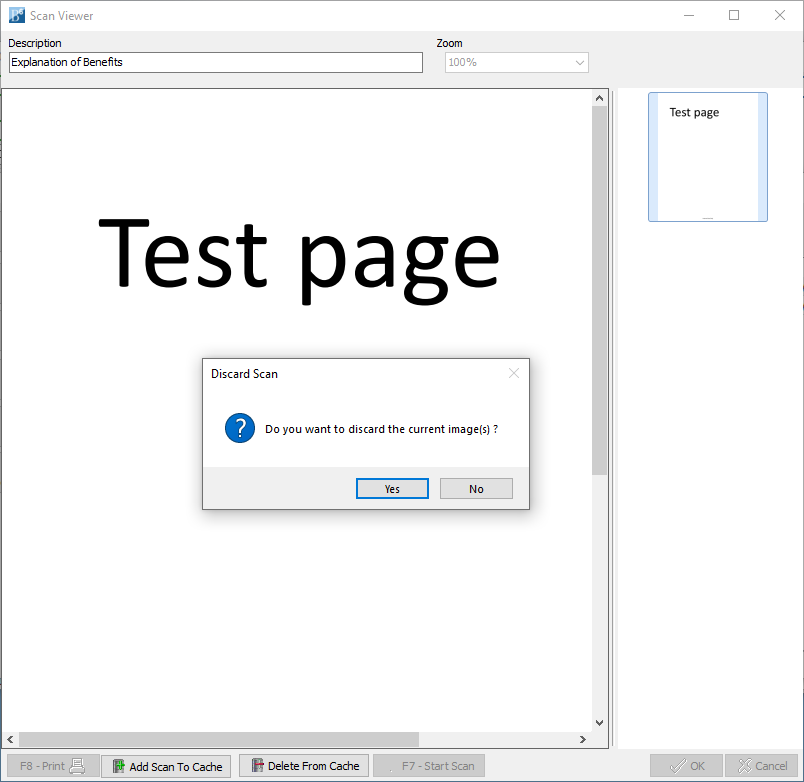
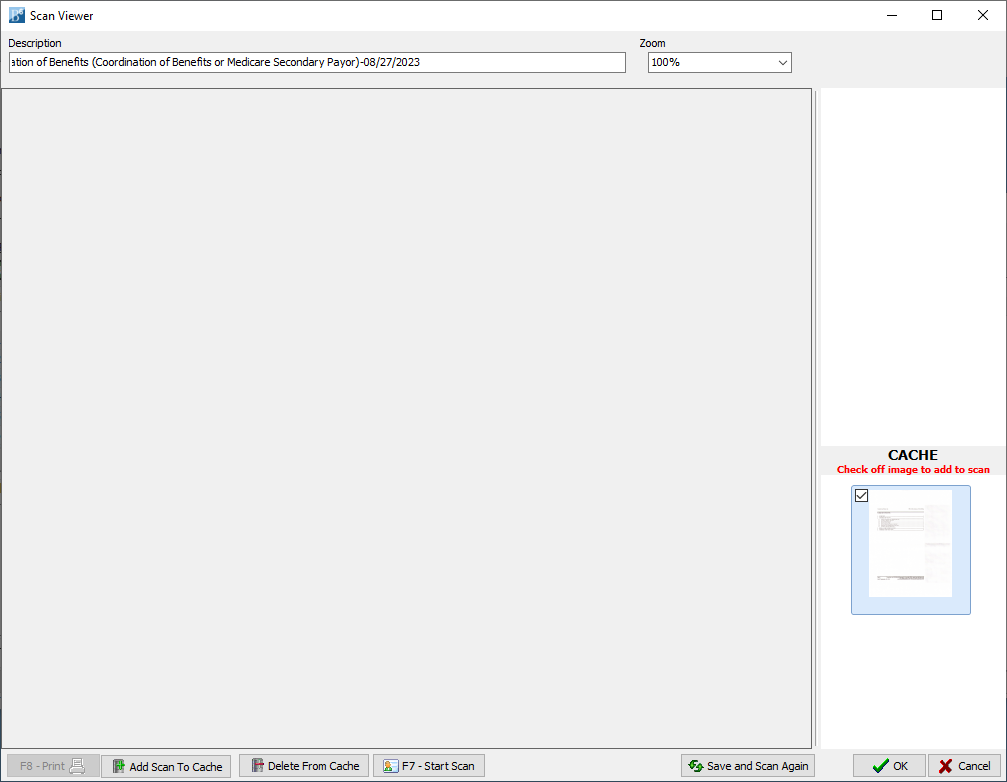
DAQbilling now supports multi-page scanning. If your scanner supports scanning multiple pages at one time, all the pages will display
on the righthand side of the screen. Clicking Ok will save all the pages as one scan. If your scanner only scans one page at a time,
additional pages can be added after the first page is scanned in by clicking “start scan” again. A box will open asking if you want to
discard the current image(s). Click “No” to scan in the next image and have it added under the previous image. If “Yes” is selected
from the box asking if you want to discard the image(s), all images will be discarded and replaced with the next scanned image.
Cache Images:
When a scan is saved to cache it will now display at the bottom right of the screen in a separate Cache section. To add a cached
image as a scan, check off the box on that image and click Ok.
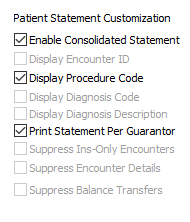
Consolidated Patient Statement:
A new patient statement layout is now available. This consolidated version will only display encounters in patient
responsibility and only one line per CPT code. This will reduce the number of pages needed to print statements.
This statement layout can be enabled under the location setup on the statement tab. Checking the “Enable Consolidated Statement”
will enable it and display the available customization options under it.
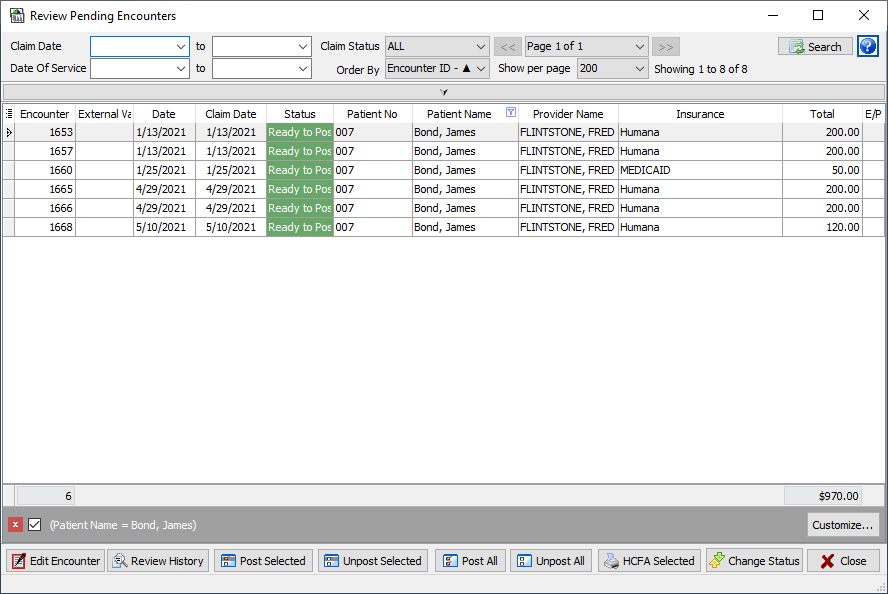
Encounter Review:
The Encounter Review screen has been updated to include filters and paging. This will allow the screen to load faster
and give the user the ability to find specific encounters quicker.
Default view:
When the screen first opens it will load the first 200 encounters and order them by encounter ID ascending. Once open,
the user can filter, sort, and change the number of encounters that load per page.
Page options:
Order by – allows the user to reorder the encounters based on encounter id, date of service, or claim date with the
option of ascending or descending for each.
Page – This option allows the user to load the next/previous page or skip to a specific page.
- • Click on the right arrow button to jump to the next page.
- • Click on the left arrow to go back to the previous page.
- • Click on the dropdown arrow to display a list of available pages. Select a page from the list to jump to that page.
Show per page – This option allows the user to set the number of encounters loaded per page.
Showing – will display the range of encounters the user is currently viewing out of the grand total of encounters based on
the search results.
Additional Filters: These filters can be displayed by clicking on the grey bar under the filters. Collapsing the additional
filters will disable them on the next search.
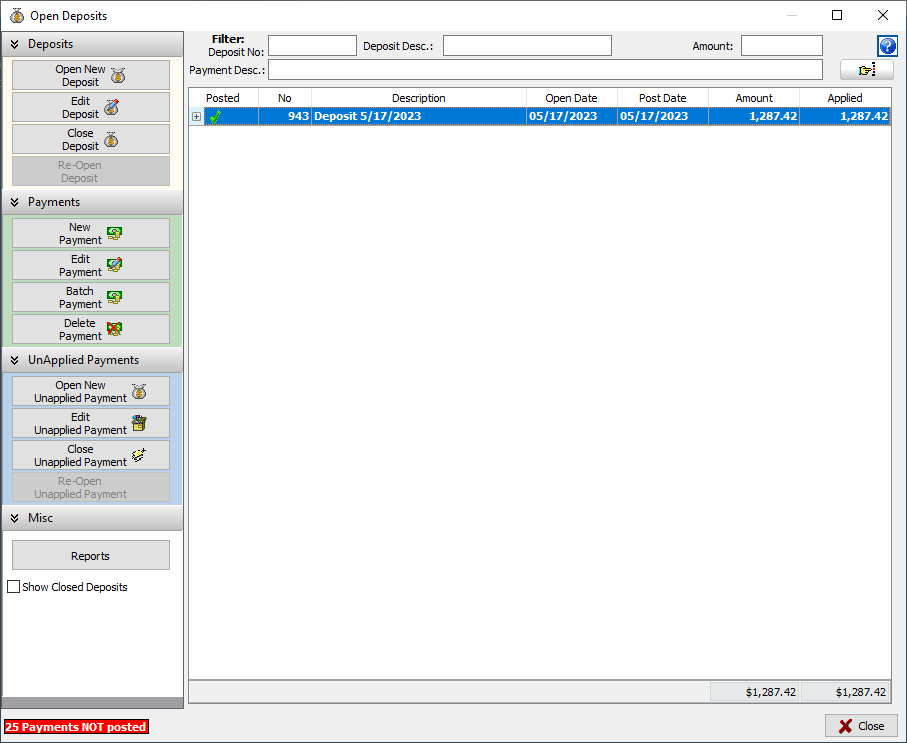
Deposit Screen
The buttons on the deposit screen have been grouped and color-coded to make them easier to find.